

Looking to boost your car’s lighting and style? Adding a light bar to your vehicle can make a huge difference.
Whether you want better visibility on dark roads or a rugged look that stands out, a light bar is a smart upgrade. But how do you add one without hassle or mistakes? This guide will walk you through every step, making the process simple and clear.
By the end, you’ll know exactly how to install a light bar that fits your car and your needs. Ready to transform your ride? Let’s dive in.
Choosing The Right Light Bar
Choosing the right light bar for your car is more than just picking a bright accessory. It involves understanding different types, the right size and brightness for your needs, and ensuring you stay within legal boundaries. Making an informed choice can enhance your driving experience and keep you safe on the road.
Types Of Light Bars
Light bars come in several types, each suited for different purposes. There are LED light bars, known for their energy efficiency and long lifespan. Halogen light bars offer a warm light but consume more power, while HID (High-Intensity Discharge) bars provide very bright illumination but can be more expensive.
Think about what you need the light bar for. Are you driving off-road, needing a wide spread of light? Or is a focused beam for highway use more important? Your choice will depend on the driving conditions you expect to face most often.
Considerations For Size And Brightness
Size matters when adding a light bar to your car. Larger bars typically provide more light but can affect your car’s appearance and aerodynamics. Smaller bars might be less powerful but easier to install and less likely to interfere with your vehicle’s design.
Brightness is measured in lumens. Too bright can blind other drivers, while too dim won’t help you see better. A good balance is crucial. Think about the typical weather and terrain you drive in—foggy or dusty conditions might require a different brightness level than clear, open roads.
Legal Regulations
Before you buy, check local laws about light bars. Some areas restrict the brightness or placement of auxiliary lights. Using illegal lights can lead to fines or force you to remove the light bar later.
Ask yourself: Is your light bar compliant with your state or country’s vehicle lighting laws? Ensuring legality saves you hassle and keeps your modifications road-friendly. It’s also wise to check if your insurance covers modifications like light bars to avoid surprises.

Credit: www.oreillyauto.com
Preparing Your Car For Installation
Preparing your car for light bar installation is an important step. It ensures the process goes smoothly and safely. Taking time to get ready helps avoid mistakes and damage to your vehicle.
This preparation involves gathering the right tools, choosing the best mounting spot, and following safety rules. Each part is essential for a successful setup.
Gathering Tools And Materials
Collect all necessary tools before starting. Common tools include:
- Screwdrivers
- Wrenches
- Drill with bits
- Wire strippers
- Electrical tape
- Zip ties
- Voltage tester
Also, have the light bar kit ready with mounting brackets and wiring harness. Having everything close saves time.
Selecting The Mounting Location
Pick a location that offers good visibility and easy wiring access. Popular spots include:
- Front bumper
- Roof rack
- Grille area
Check the surface for flatness and strength. Avoid places that block airflow or interfere with airbags.
Safety Precautions
Work in a well-lit, dry area. Disconnect the car battery before handling electrical parts.
Wear safety glasses and gloves. Keep tools organized to prevent accidents.
Follow manufacturer instructions carefully to avoid wiring errors and damage.
Installing The Light Bar
Installing a light bar on your car can boost both style and visibility during nighttime drives or off-road adventures. However, the installation process requires careful attention to ensure safety and functionality. Let’s break down the key steps to get your light bar mounted, wired, and perfectly adjusted.
Mounting The Light Bar Securely
Start by choosing a sturdy mounting location on your vehicle, such as the roof rack, bumper, or grille guard. The spot should provide a clear field of light without obstructing your view or other vehicle components.
Use the mounting brackets that come with your light bar, or opt for custom brackets if needed. Tighten all bolts firmly, but avoid overtightening to prevent damage to the light bar or your car’s frame.
Have you checked if your chosen spot allows easy access for future adjustments or maintenance? Secure mounting not only keeps the bar stable but also protects it from vibrations and harsh road conditions.
Wiring And Electrical Connections
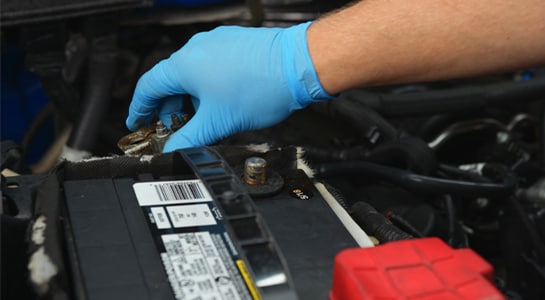
Proper wiring is crucial to avoid electrical shorts and ensure your light bar operates correctly. Begin by disconnecting the car battery for safety.
Run the wiring harness along existing cables or frame rails to keep them hidden and protected. Use zip ties to secure loose wires and prevent snagging on moving parts.
Connect the positive and negative wires to the appropriate terminals, usually through a relay and fuse to protect your vehicle’s electrical system. Don’t forget to ground the light bar properly to avoid flickering or power loss.
Testing And Adjusting The Light Bar
Reconnect your battery and turn on the light bar to test its functionality. Observe if all LEDs light up evenly without flickering or dim spots.
Adjust the angle of the light bar to maximize road illumination without blinding other drivers. A good tip is to aim the beam slightly downward and to the sides for broader coverage.
Have a friend assist you by standing in front of the vehicle while you make adjustments. This ensures you get the perfect beam spread and height for safe night driving.
Credit: www.oreillyauto.com

Credit: www.oreillyauto.com
Frequently Asked Questions
How Do I Choose The Right Light Bar For My Car?
Choose a light bar based on your car’s size and intended use. Consider brightness, beam pattern, and power consumption. Ensure it is compatible with your car’s electrical system. Opt for durable, weather-resistant materials for longevity and safety.
What Tools Are Needed To Install A Car Light Bar?
You’ll need basic tools like screwdrivers, wrenches, wire strippers, and a drill. Also, have electrical tape, connectors, and mounting brackets. A multimeter helps check electrical connections. Safety gloves and goggles are recommended for protection.
Can I Install A Light Bar Myself Safely?
Yes, with proper tools and instructions, you can install it safely. Follow wiring diagrams carefully to avoid electrical issues. Secure the light bar firmly to prevent movement. Disconnect the battery before starting installation to ensure safety.
How Do I Wire A Light Bar To My Car Battery?
Connect the light bar’s positive wire to the battery’s positive terminal using a fuse. Attach the negative wire to the battery’s negative terminal or a ground point. Use a relay and switch for safe operation. Ensure all connections are secure and insulated.
Conclusion
Adding a light bar to your car can improve visibility at night. Follow the steps carefully to ensure safe installation. Choose the right light bar size and type for your vehicle. Secure all connections tightly to avoid electrical problems. Test the light bar before driving to check its function.
This upgrade makes night driving safer and more comfortable. Enjoy clearer roads and better sight on dark paths. Simple tools and patience help you do it well. Your car looks better and works smarter with extra light.


