

Are your car’s brakes feeling less responsive or making strange noises? It might be time to replace your brake pads.
Knowing how to install brake pads on your car can save you money and give you confidence behind the wheel. In this guide, you’ll discover simple, step-by-step instructions that anyone can follow—no special tools or experience needed. By the end, you’ll have the skills to keep your brakes working smoothly and your car safe on the road.
Ready to take control of your car’s maintenance? Let’s get started.

Credit: m.youtube.com
Prepare Your Tools And Workspace
Before you dive into replacing your car’s brake pads, setting up your tools and workspace properly is crucial. Having everything ready saves time and reduces frustration during the job. Plus, a well-organized area keeps you safe and helps you focus on the task at hand.
Gather Necessary Tools
Start by collecting all the tools you’ll need. Common items include:
- Socket wrench set
- C-clamp or brake caliper tool
- Flathead screwdriver
- Jack and jack stands
- Brake cleaner spray
- New brake pads
- Gloves and safety glasses
Having these tools within reach prevents unnecessary trips and keeps the process smooth. Ever started a task only to realize you’re missing a key tool? It disrupts your workflow and adds stress.
Ensure Safety Measures
Safety isn’t optional when working on brakes. Always wear protective gloves and goggles to shield your hands and eyes from debris and chemicals. Also, keep a fire extinguisher nearby—brake dust can be flammable under the right conditions.
Consider your clothing too. Avoid loose sleeves or jewelry that might get caught. Are you prepared to stop if something unexpected happens? Taking a moment to set these precautions can prevent accidents before they start.
Lift And Secure The Car
Properly lifting and securing your car is the foundation for safe brake pad installation. Use a reliable car jack to lift the vehicle and place jack stands under solid points to support it. Never rely solely on the jack; it can fail and cause serious injury.
Once the car is elevated, give it a gentle shake to confirm it’s stable. Have you checked your jack’s weight limit and condition recently? Making sure your equipment is up to the task protects both you and your car.
Credit: caronphone.com
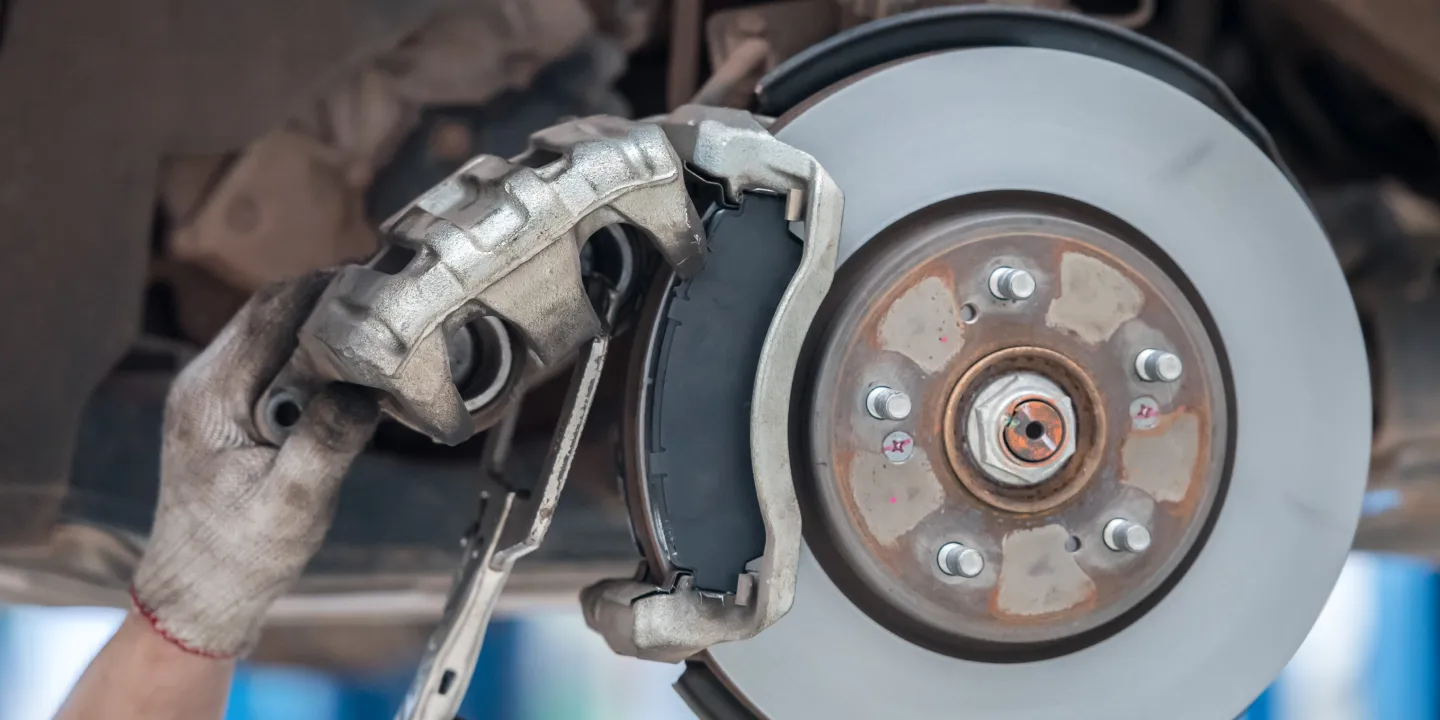
Remove Old Brake Pads
Removing old brake pads is a crucial step in maintaining your car’s braking system. It ensures that your new pads fit perfectly and work efficiently. If you skip this step or do it poorly, your brakes might not perform as expected, risking your safety on the road.
Remove The Wheel
Start by loosening the lug nuts on the wheel before lifting the car. Use a jack to raise your vehicle and secure it with jack stands for safety.
After the car is stable, fully remove the lug nuts and take off the wheel. This gives you clear access to the brake components and makes the job easier.
Access The Brake Caliper
Locate the brake caliper, which holds the brake pads against the rotor. You’ll usually need a wrench or socket set to remove the bolts securing the caliper.
Carefully slide the caliper off the rotor without disconnecting the brake line. You can rest it on a sturdy surface or hang it with a piece of wire to avoid damage.
Take Out The Old Pads
Look at how the brake pads sit inside the caliper bracket. They should slide out with a little effort, but sometimes they might be stuck due to dirt or corrosion.
If you find resistance, gently pry them out using a flat tool like a screwdriver. Notice the orientation and positioning of the old pads so you can install the new ones correctly.
Have you checked the condition of the brake hardware and clips? If they look worn or damaged, replacing them can prevent future issues and improve brake performance.
Install New Brake Pads
Installing new brake pads is a key part of brake maintenance. Fresh pads improve stopping power and safety. Follow careful steps to place the pads correctly and ensure proper brake function.
Position The New Pads
Place the new brake pads into the caliper bracket. Make sure the friction surface faces the rotor. Align the pads evenly to prevent uneven wear. Check that the pads fit snugly without forcing them.
Reassemble The Brake Components
Reinstall the caliper over the new brake pads. Secure the caliper bolts tightly but avoid over-tightening. Reconnect any clips or pins that hold the pads in place. Verify all parts are correctly aligned and secure.
Test The Brakes
Before driving, press the brake pedal several times to seat the new pads. Listen for unusual noises or vibrations. Test the brakes at low speed to confirm proper function. Ensure the pedal feels firm and responsive.

Credit: www.youtube.com
Frequently Asked Questions
How Do I Know When To Replace Brake Pads?
Brake pads need replacement when you hear squealing or notice reduced braking. Check thickness; below 3mm means replacement is necessary.
What Tools Are Required To Install Brake Pads?
You need a jack, lug wrench, C-clamp, socket set, and screwdriver. These tools help safely remove and replace brake pads.
Can I Install Brake Pads Without Professional Help?
Yes, if you follow safety steps and instructions carefully. Basic mechanical skills and the right tools are essential.
How Long Does It Take To Install Brake Pads?
Typically, it takes about 30 to 60 minutes per axle. Time varies based on experience and vehicle model.
Conclusion
Installing brake pads on your car is a task you can handle. Take your time, follow each step carefully, and stay safe. Clean parts and proper tools make the job easier. Test your brakes gently after installation. Regular brake maintenance keeps your car safe and smooth.
Trust your work and enjoy the confidence of driving with fresh brake pads. Simple steps lead to better car care. You’ve got this!


