

Are you ready to upgrade your driving experience with a Wireless Kuayvans Car Stereo? Installing this powerful device can seem tricky, but it doesn’t have to be.
Imagine enjoying crystal-clear sound, hands-free calls, and seamless music streaming—all without messy wires cluttering your car. In this guide, you’ll discover simple, step-by-step instructions to get your new stereo up and running quickly. By the end, you’ll feel confident and proud of your new setup.
Keep reading to transform your car rides into an amazing audio adventure!
Credit: www.amazon.ca
Preparing For Installation
Preparing for the installation of your Wireless Kuayvans Car Stereo is vital. Proper preparation ensures a smooth and safe process. Take time to organize tools and understand each step before starting. This will help avoid mistakes and protect your car’s electrical system.
Gathering Tools And Materials
Collect all necessary tools and materials before beginning. Common tools include:
- Flathead and Phillips screwdrivers
- Wire strippers and cutters
- Socket wrench set
- Electrical tape
- Panel removal tool
- Multimeter (optional, for testing wires)
Also, have the Wireless Kuayvans Car Stereo and any mounting brackets or wiring harnesses ready. This saves time and prevents interruptions during installation.
Disconnecting The Car Battery
Disconnecting the car battery is crucial for safety. It stops electrical shorts and protects the car’s electronics. Locate the negative terminal of your car battery. Use a wrench to loosen the nut and carefully remove the cable. Keep the cable away from the battery terminal while working.
Do not touch any wires or metal parts during this step. This prevents shocks and damage to the stereo system.
Removing The Old Stereo
Start by removing trim panels around the existing stereo. Use a panel removal tool or a flathead screwdriver wrapped in cloth. This protects the dashboard from scratches. Unscrew mounting screws holding the old stereo in place. Carefully pull the stereo out without forcing it.
Disconnect all wiring harnesses and antenna cables from the back of the old unit. Set the old stereo aside. Keep screws and panels safe for reinstallation or future use.
Installing The Wireless Kuayvans Stereo
Installing the Wireless Kuayvans Stereo enhances your car’s audio without the hassle of extra wires. The process is straightforward and can be done with basic tools. Follow clear steps to ensure a secure and functional setup. Proper installation guarantees the best sound experience and device performance.
Connecting Wiring Harness
Begin by matching the car’s wiring harness to the stereo’s connector. Each wire has a color code for power, speakers, and ground. Connect the same color wires using crimp connectors or electrical tape. Double-check connections to avoid shorts or sound issues. Secure the wiring harness firmly to prevent disconnections during driving.
Mounting The Stereo Unit
Slide the stereo unit into the dashboard slot carefully. Use the mounting brackets included with the stereo for stability. Align the unit so it fits snugly without forcing it. Tighten screws to keep the stereo steady. Avoid overtightening, which may damage the dashboard or unit.
Securing Connections
After mounting, inspect all wiring connections for tightness. Use zip ties to bundle cables neatly and avoid tangling. Check that antenna and auxiliary cables are firmly plugged in. Test the stereo by turning it on and playing audio. Fix any loose connections before finalizing the installation.
Testing And Final Adjustments
After installing your Wireless Kuayvans Car Stereo, testing and making final adjustments is essential to ensure everything works smoothly. This phase allows you to catch any issues early and tailor the system to your preferences. Taking a few extra minutes here can save you frustration later.
Powering On The Stereo
Start by turning on your car’s ignition and then powering up the stereo. Pay close attention to any startup sounds or display messages that might indicate a problem. If the stereo doesn’t turn on, double-check all wiring connections and the car battery’s charge.
Once powered, observe how the screen responds and if buttons react properly. A quick test of volume control and source switching helps confirm functionality. Have you noticed any delays or unusual noises at this stage? These clues often point to loose connections or faulty components.
Pairing Wireless Devices
Next, pair your smartphone or other wireless devices with the stereo via Bluetooth. Open your device’s Bluetooth settings and look for the Kuayvans stereo name. Select it and wait for the confirmation prompt to connect.
During pairing, ensure your phone’s Bluetooth is set to visible mode to avoid connection issues. If pairing fails, try restarting both the stereo and your device. Have you tried removing old paired devices to clear any potential conflicts?
- Check for firmware updates on the stereo to improve compatibility.
- Test multiple devices to confirm consistent wireless connection.
- Keep devices within a reasonable range to avoid dropouts.
Adjusting Audio Settings
Once connected, customize the audio settings to match your listening preferences. Experiment with bass, treble, and balance controls to achieve the best sound quality for your car’s acoustics.
Don’t hesitate to use preset equalizer modes as a starting point, then fine-tune from there. Have you noticed certain settings making your favorite music sound better or worse?
Remember, small tweaks can make a significant difference in audio clarity and comfort during drives. Adjust volume limits if needed to protect your speakers and ears. Testing these settings on various music genres helps you find the perfect setup for every journey.

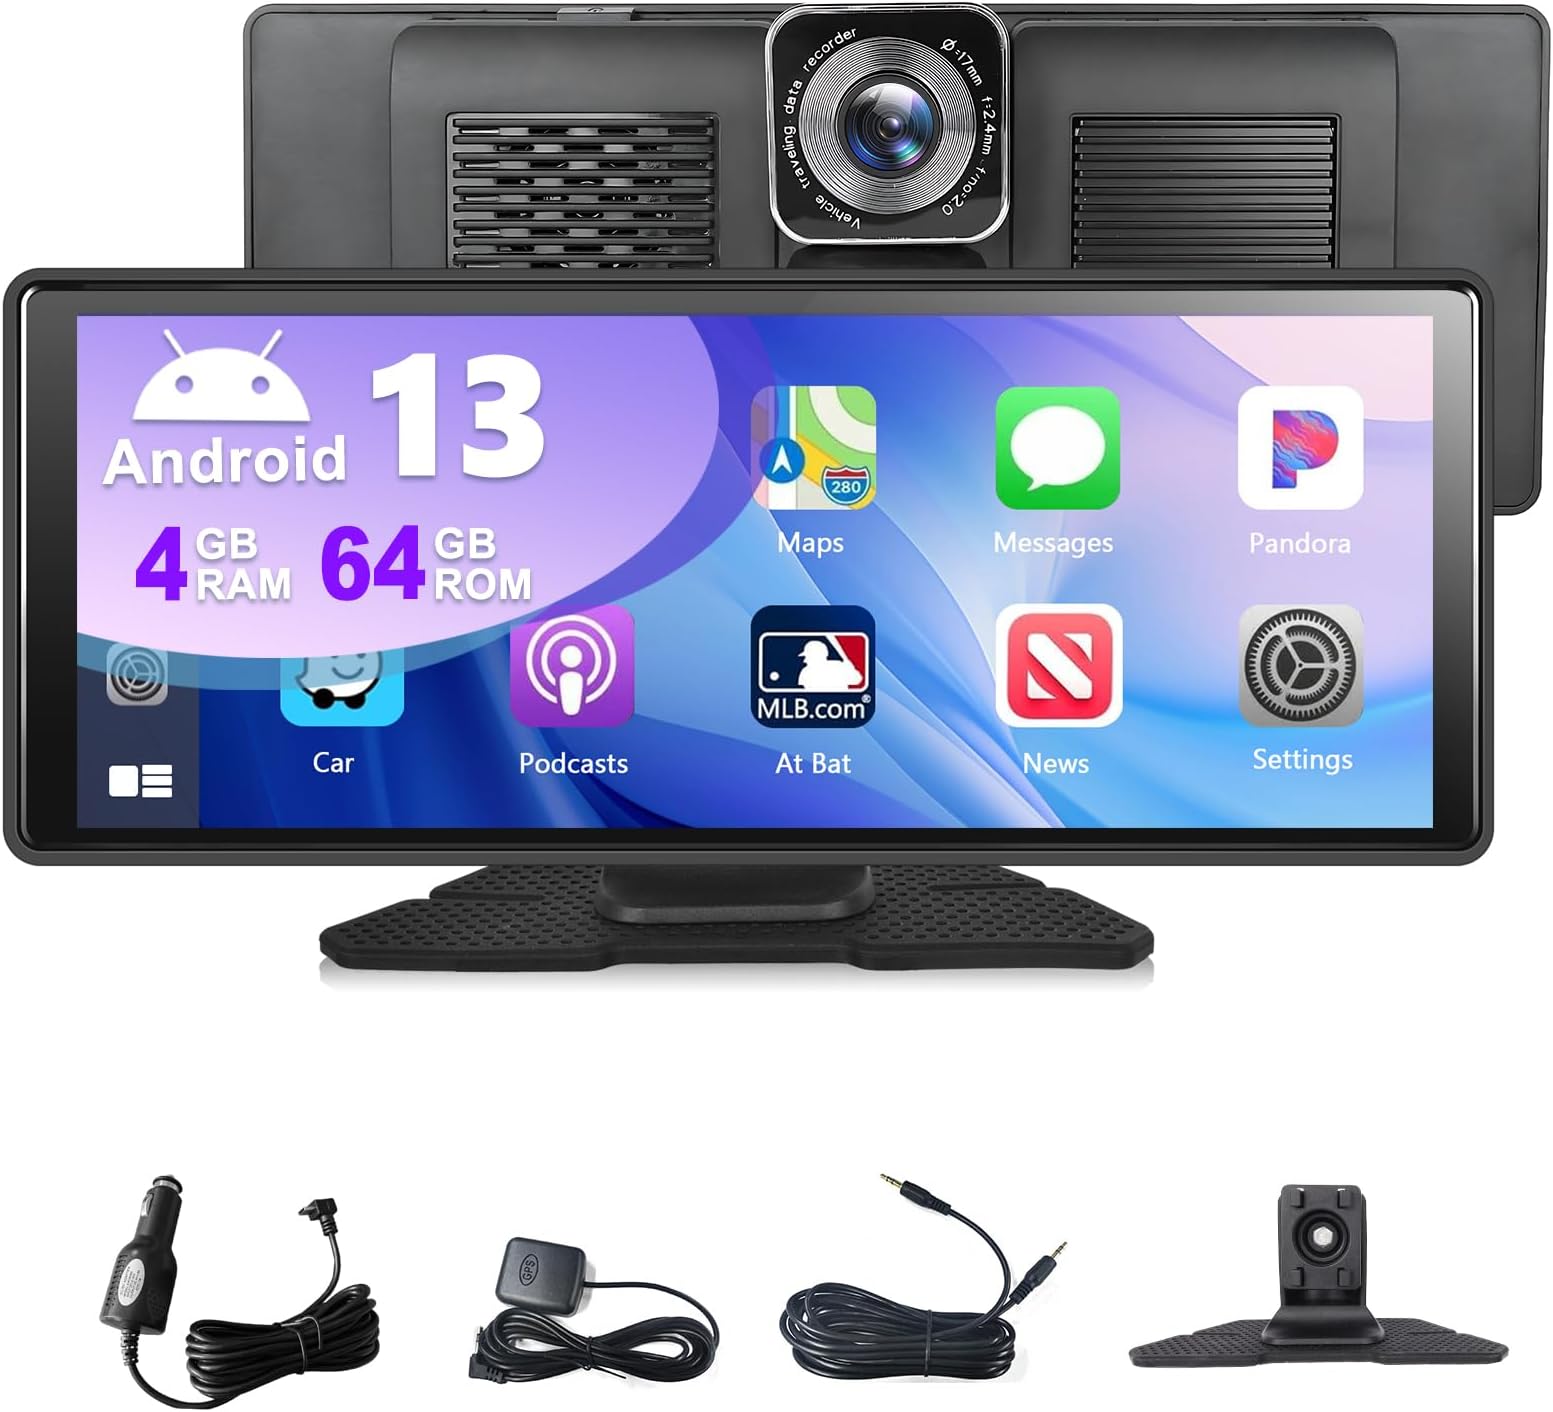
Credit: www.amazon.ca
Credit: scoil-bhride.com
Frequently Asked Questions
What Tools Are Needed To Install Wireless Kuayvans Car Stereo?
You need a screwdriver, wire stripper, electrical tape, and mounting kit. These tools help secure and connect the stereo safely and efficiently.
How Do I Connect Wireless Kuayvans Car Stereo To My Car?
Connect the stereo wiring harness to your car’s power and speaker wires. Pair it with your phone via Bluetooth for wireless audio streaming.
Can I Install Wireless Kuayvans Car Stereo Myself?
Yes, with basic car audio knowledge and proper tools. Follow the step-by-step guide carefully to avoid damaging your vehicle or stereo.
How To Ensure Wireless Kuayvans Car Stereo Fits My Car?
Check the stereo’s size and compatibility with your car’s dashboard. Most Kuayvans models fit standard double-DIN or single-DIN slots.
Conclusion
Installing the Wireless Kuayvans Car Stereo is simple and quick. Follow each step carefully for best results. Double-check all connections before powering on your stereo. Enjoy wireless music and hands-free calls while driving. This upgrade makes your car rides more fun and safe.
Keep the user manual handy for future reference. Now, your car stereo setup is complete and ready to use.


