

If you’ve noticed your car making strange noises when you brake or your stopping distance is getting longer, it’s probably time to replace your brake pads. Knowing how to do this yourself can save you money and give you confidence in maintaining your vehicle.
In this guide, you’ll learn simple, step-by-step instructions to replace your brake pads safely and effectively. By the end, you’ll feel empowered to handle this important task on your own—and keep your car running smoothly. Ready to take control of your car’s safety?
Let’s get started.

Credit: www.youtube.com
Tools And Materials Needed
Replacing brake pads requires the right tools and materials to make the job smooth and safe. Having everything ready before you start saves you from frustrating stops and unexpected trips to the store. Your safety depends on how well you prepare, so don’t skip this step.
Essential Tools For Replacing Brake Pads
- Jack and Jack Stands:You need these to lift your car and keep it stable while you work. Never rely on just the jack alone.
- Lug Wrench:This tool loosens and tightens the lug nuts on your wheels. Make sure it fits your car’s wheel size.
- C-Clamp or Brake Caliper Tool:Used to compress the brake caliper piston back into place. It’s crucial for fitting the new pads properly.
- Socket Set or Wrenches:These help remove caliper bolts. Sizes vary by car model, so check your vehicle’s specifications.
- Flathead Screwdriver or Pry Bar:Useful for prying off the old brake pads and sometimes removing caliper clips.
Materials You’ll Need For The Job
- New Brake Pads:Choose pads that match your car’s make and model. Some pads offer better performance or longer life, so pick what suits your driving style.
- Brake Cleaner:This spray removes dust and debris from your brake components. Clean parts ensure better braking and longer life.
- Brake Grease:Apply this to the back of the pads and caliper pins. It prevents squeaking and helps parts move smoothly.
- Rags or Shop Towels:Keep these handy to wipe off grease and dirt as you work.
- Protective Gloves and Safety Glasses:Your skin and eyes need protection from brake dust and chemicals.
Extras That Make The Job Easier
- Torque Wrench:Tighten lug nuts and bolts to the manufacturer’s specs. This avoids damage and ensures safety.
- Bungee Cord or Wire Hanger:Use these to hang the brake caliper out of the way without stressing the brake line.
- Flashlight or Work Light:Good lighting reveals dirt, wear, and helps you avoid mistakes.
Ever started a project only to realize a crucial tool was missing? That’s a frustrating experience you want to avoid with brake pad replacement. Have you checked your toolbox lately to confirm you have everything? Taking a moment to prepare saves you time and keeps you safe on the road.

Credit: www.youtube.com
Removing The Old Brake Pads
Removing the old brake pads is a crucial part of the brake pad replacement process. It might seem straightforward, but getting it right ensures your new pads will function properly and safely. If you rush or skip steps, you could damage other components or miss signs of deeper issues.
Preparing Your Workspace And Tools
Start by making sure your car is securely lifted and supported with jack stands. Never rely on a jack alone—safety comes first. Gather the necessary tools like a lug wrench, socket set, C-clamp, and a flathead screwdriver before you begin.
Organize your tools nearby to avoid distractions. A clean, well-lit workspace helps you spot small parts like clips or pins that might fall out during removal.
Removing The Wheel And Accessing The Brake Caliper
Loosen the lug nuts while the car is still on the ground to avoid wheel spin. Once lifted, remove the wheel completely to expose the brake assembly. This step gives you clear access to the brake caliper and pads.
Have you noticed how much dirt accumulates behind the wheel? Take a moment to clean the area; it prevents debris from interfering with the new pads.
Detaching The Brake Caliper
Locate the bolts holding the brake caliper in place and remove them carefully. Support the caliper using a piece of wire or bungee cord to avoid straining the brake hose. Never let the caliper hang freely—it can cause damage.
This step can be tricky if the bolts are rusted. Applying a penetrating lubricant and letting it sit can make loosening easier.
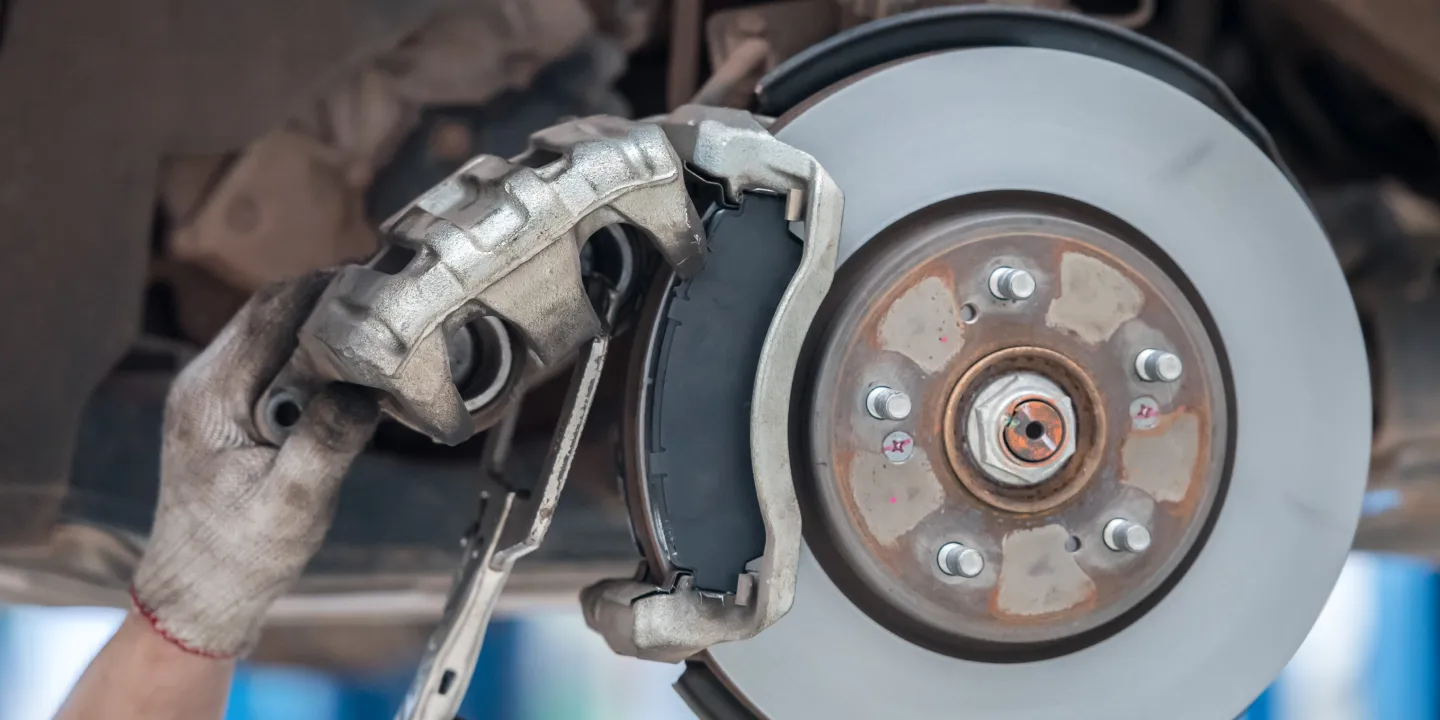
Sliding Out The Old Brake Pads
Once the caliper is off, the old brake pads should slide out with gentle pressure. If they’re stuck, tap them lightly with a rubber mallet or use a flathead screwdriver to pry them free.
Check the condition of the rotors while the pads are out. Uneven wear or grooves could mean additional repairs are needed before installing new pads.
Installing New Brake Pads
Installing new brake pads is a crucial stage in the brake replacement process. It demands attention to detail and a steady hand to ensure safety and performance. Let’s break down the key parts to help you tackle this task confidently.
Preparing The Caliper For New Pads
Start by carefully pushing the caliper piston back into its housing. This step creates enough space for the new, thicker brake pads. Use a C-clamp or a brake caliper tool to apply even pressure—rushing or forcing it can damage the piston.
Remember to keep the brake fluid reservoir cap open during this to avoid pressure buildup. It’s a small detail, but ignoring it can cause fluid to spill or brake lines to get damaged.
Positioning The New Brake Pads
Place the new brake pads onto the caliper bracket where the old ones sat. Make sure the friction surface faces the rotor. Double-check that each pad fits snugly without forcing it into place.
Some brake pads come with anti-squeal shims or clips—don’t skip installing these if included. They reduce noise and keep the pads stable during braking, improving your driving experience.
Securing The Caliper Over The New Pads
Once the pads are in place, gently slide the caliper back over them and onto the rotor. Align the caliper bolt holes and tighten the bolts securely but don’t overtighten.
Check that the caliper moves slightly side to side but stays firmly in place. This balance ensures the pads press evenly on the rotor without binding or rattling.
Testing Your Work Before Driving
After installation, press the brake pedal several times to seat the pads properly against the rotor. You should feel the pedal firm up, indicating the brakes are ready.
Have you ever ignored this step only to find your brakes feeling spongy on the road? Taking a moment here can prevent dangerous surprises later.
Credit: caronphone.com
Frequently Asked Questions
How Often Should I Replace Brake Pads?
Brake pads typically last between 30,000 to 70,000 miles. Replace them when thickness is below 3mm or if you hear squealing. Regular inspection ensures safety and optimal braking performance.
What Tools Do I Need To Replace Brake Pads?
You need a jack, lug wrench, C-clamp, socket set, and new brake pads. Safety gloves and eye protection are also essential. Having the right tools makes the job easier and safer.
Can I Replace Brake Pads Without Professional Help?
Yes, if you have basic mechanical skills and tools. Follow a step-by-step guide carefully. However, if unsure, seek professional assistance to avoid safety risks.
How Long Does It Take To Replace Brake Pads?
Replacing brake pads usually takes 30 to 60 minutes per axle. Time varies based on experience and vehicle type. Proper time ensures thorough and safe installation.
Conclusion
Replacing brake pads can save money and improve safety. Follow the steps carefully and take your time. Always check your work before driving. Clean tools and a calm mind help a lot. Regular brake maintenance keeps your car running well.
Start with simple repairs and gain confidence. You can do this with patience and care. Stay safe and enjoy smoother stops on the road.


