

Are you ready to upgrade your car with bright LED light bars but unsure how to wire them safely and correctly? Wiring LED light bars might seem tricky at first, but with the right steps, you can do it yourself and avoid costly mistakes.
In this guide, you’ll discover simple, clear instructions that make the whole process easy to follow—even if you’re not an expert. Keep reading to learn how to power up your LED light bars and boost your vehicle’s lighting in no time!

Credit: www.amazon.ca
Choosing The Right Led Light Bar
Choosing the right LED light bar for your car is more than just picking the brightest option. It impacts how well the lights perform, how easy they are to install, and how long they last. Understanding the types, power needs, and mounting options will help you make a choice that fits your specific needs and driving conditions.
Types Of Led Light Bars
LED light bars come in several styles, each designed for different uses. There are spot beams that focus light on a narrow area, perfect for long-distance visibility. Flood beams spread light over a wide area, ideal for close-range illumination.
Many light bars combine both spot and flood beams to provide a balanced light pattern. You might want a slim, low-profile bar if you prefer a subtle look or a larger, more powerful bar for off-road adventures. What kind of driving do you do most often? That will guide your choice.
Power Requirements
Every LED light bar has specific power needs, usually listed in volts and amps. Most car electrical systems operate at 12 volts, but it’s critical to check that your vehicle can supply enough current without overloading the circuit. If the light bar draws too much power, it can cause electrical issues or damage.
Look for light bars with built-in voltage regulators or consider adding a relay and fuse to protect your vehicle’s wiring. Think about how long you plan to use the lights per drive; continuous use demands a stable power source. Do you have experience with your car’s electrical system, or will you need professional help?
Mounting Options
Mounting affects both the effectiveness of the LED light bar and how secure it is on your vehicle. Common mounting options include roof mounts, bumper mounts, and grille mounts. Each location changes the light’s angle and coverage area.
Roof mounts offer the highest placement, giving you maximum light spread but may affect your car’s aerodynamics. Bumper mounts are lower but easier to install and maintain. Some mounts come with adjustable brackets, allowing you to change the angle as needed. What space do you have available on your car, and how permanent do you want the installation to be?
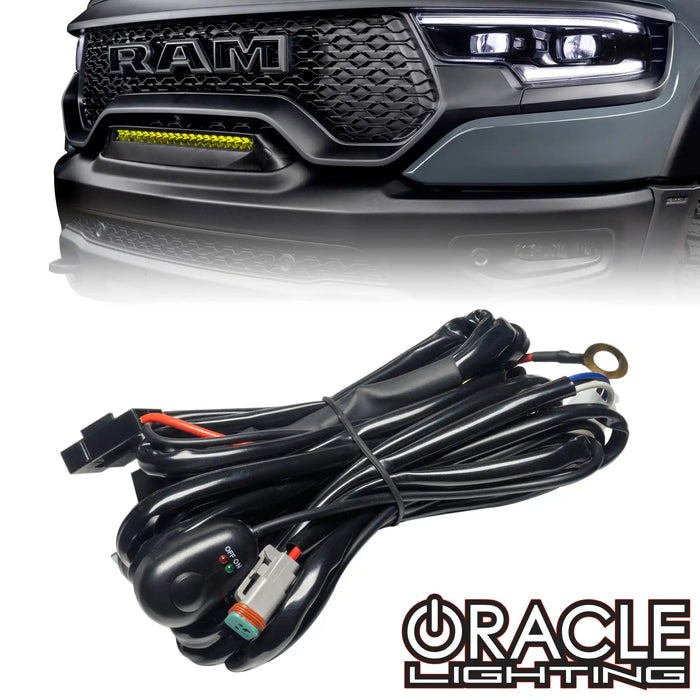
Credit: www.oraclelights.com
Wiring Essentials
Wiring your LED light bar correctly is the foundation of a reliable and safe setup. Without the right knowledge and tools, you risk damaging your vehicle’s electrical system or ending up with a light bar that doesn’t work as expected. Understanding the essentials of wiring ensures you build a system that’s durable, functional, and safe to operate.
Necessary Tools And Materials
Before you start, gather all the tools and materials you’ll need. Having everything at hand saves time and reduces frustration during the installation.
- LED light bar kit:Includes the light bar, mounting brackets, and wiring harness.
- Wire stripper and crimper:Essential for preparing wires and making secure connections.
- Multimeter:Helps you test voltage and continuity to avoid mistakes.
- Electrical tape and heat shrink tubing:Protects your connections from moisture and shorts.
- Relay and fuse:Protects your vehicle’s electrical system from overloads.
- Switch:Allows you to control the light bar from inside your car.
Having quality tools can make wiring feel straightforward. Do you have the right gear ready before you begin?
Understanding Wiring Diagrams
Wiring diagrams are like maps for your installation—they show how each component connects and where to place fuses and relays. Reading these diagrams carefully prevents wiring mistakes that can cause shorts or component failure.
Most LED light bars come with a simple wiring diagram. It’s important to follow it exactly. Pay attention to wire colors and connection points—mixing up positive and negative leads is a common error.
If you’re unsure about a diagram, test each wire with your multimeter before making permanent connections. Have you looked closely at your wiring diagram to spot potential trouble spots?
Safety Precautions
Safety should be your top priority when working with your car’s electrical system. Disconnect the battery before starting to avoid accidental shocks or short circuits.
Use a fuse rated for your light bar’s amperage near the battery connection. This simple step can save your vehicle from electrical fires or damage.
Always double-check connections for tightness and insulation. Loose wires can create sparks and cause failures down the road. How much time do you spend verifying your connections before powering up?
Step-by-step Installation
Installing LED light bars in your car improves visibility and enhances style. Following a clear, step-by-step process ensures safety and proper functioning. This guide breaks down each phase for easy wiring and setup.
Preparing The Vehicle
Start by parking your car on a flat surface. Turn off the engine and disconnect the battery to prevent shocks. Choose the mounting location for your LED light bar. Clean the area to remove dirt and grease. Make sure all mounting brackets fit securely. Gather all tools and wiring materials before beginning.
Connecting The Wiring Harness
Identify the positive and negative wires on the light bar. Connect the wiring harness to the light bar terminals. Attach the fuse holder to the positive wire. Connect the other end of the fuse holder to the battery’s positive terminal. Ground the negative wire to the car chassis. Use wire connectors or solder for secure joints. Cover connections with electrical tape or heat shrink tubing.
Testing And Securing The Setup
Reconnect the car battery. Switch on the light bar to check if it lights up. Inspect all wire connections for firmness. Mount the wiring harness away from moving parts and heat sources. Use zip ties or clamps to secure loose wires. Adjust the light bar angle for optimal road illumination.

Credit: www.amazon.ca
Frequently Asked Questions
How Do I Wire A Led Light Bar To My Car Battery?
Connect the LED light bar’s positive wire to the battery’s positive terminal. Attach the negative wire to a grounding point on the car’s chassis. Use a fuse and relay for safety and proper current flow.
What Tools Are Needed To Wire Led Light Bars In Cars?
You need wire strippers, crimping tools, a relay, fuse holder, electrical tape, and screwdrivers. Also, use a multimeter to check connections for safety and functionality.
Can I Wire Multiple Led Light Bars Together?
Yes, wire multiple LED light bars in parallel to maintain voltage. Use a relay and appropriate fuse to manage the total current safely.
Where Should I Install The Relay When Wiring Led Light Bars?
Install the relay close to the battery on the positive wire. This placement helps protect the circuit and ensures efficient power delivery.
Conclusion
Wiring LED light bars in your car can improve visibility at night. Follow safety rules and use the right tools for a good setup. Take your time to connect wires correctly and avoid mistakes. Test the lights before finishing the installation.
Good wiring keeps your lights working well and lasts longer. Enjoy brighter, safer drives with your new LED light bar.


